This area does not yet contain any content.

Entries in Kim's renos and decos (142)

Sunday
Mar012009

My sofa project

I decided a little while ago that my living room sofa was not working for me. It was cute, I'll give it that. But it was NOT loungey. Definitively not wide enough for my boyfriend and I to sprawl on and watch movies. I'm hoping to find it a new home since I have no other room to put it in. I knew I'd never find a sofa that would suit my needs and my budget so my boyfriend and I built one. Since our carpentry skills are limited, I am quite surprised it turned out as well as it did. We finished building it a few days ago, and I painted it Friday.

Since I wanted something low and loungey, I figured the easiest way to get what I wanted would be to get some cushions, and basically build boxes for them. Instead of buying foam for the cushions, I went to Ikea and bought cushions from one of their sofas where they were sold separately from the frame. There were 4 cushions - 2 for the base and 2 narrower ones for the back. So working with that we built one main base that houses the 2 larger cushions and an individual base for each of the narrower ones. This is the main base before I painted it.


We used rounded fence post toppers (?) for the feet of the main section (I have pieces of furniture pads underneath them in the photos because it weighs a ton and I'm worried it's going to dent the floor), and casters for the feet of the 2 smaller sections. This way the smaller pieces could be wheeled around the living room to accommodate different seating arrangements. Because I wanted a pile of pillows along the back of the main section and I was concerned they would take up too much space, we built a ledge along the back (which you can see in the third photo) to house the majority of the pillows, leaving ample room for sprawling.

I've had a couple of chances to try out the new sofa (I'm on it as I type this) and it's incredible. It's so versatile and ridiculously comfortable. I need to make new covers for the seat cushions. I bought the covers from Ikea for them but they are a thick canvas and cat hair sticks to it in an obscene way so I need something more cat friendly. I also just threw on a bunch of pillows for the photos below, but I need to buy fabric for new pillows as well. I'm thinking of sticking with neutrals, with lots of texture, and maybe a couple pillows in jewel toned colours to work with the rest of the living room and kitchen. I'm also considering stenciling the frames, but I have to give that more thought.

Here are some photos I took of the sofa with different placement of the smaller pieces.


Tuesday
Feb032009

Kim's home office

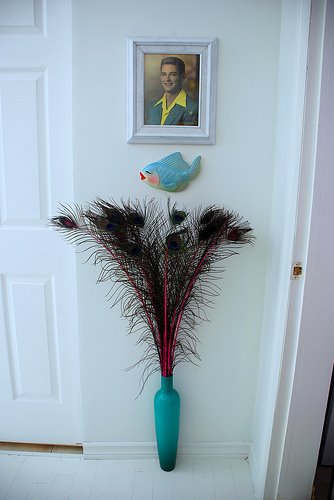
One of the few rooms in my house that is somewhat finished is my home office. Back in May I posted about painting the floors and the frame of the door. Before I began the kitchen renovation I had managed to complete the space with some revamped furnishings and lots of vintage finds. I think it's about time I share the progress.

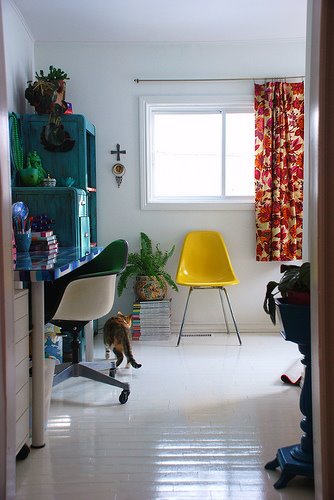
It's a pretty small room - 10 ft long by 11.5 ft wide, with a 5ft square bathroom in one corner, making the room L-shaped. One part of the L is my office, and the other part is an entrance from the back deck. Here is what it looked like right after I moved in.


It was awful. Pale blue walls, unpainted trim (the entire house had unpainted trim - WHY???), and the hardwood was totally uninspiring. It was a really fun room to redo and since it gets alot of sun I wanted it to be cheerful and bright. First thing I did was paint the floors, trim, walls and ceiling white. My pink laptop should be on the desk in the photos below but it's a cold room in the winter so I've been working on the dining table since the kitchen was completed.


Below is in the left corner as soon as you walk in the room.


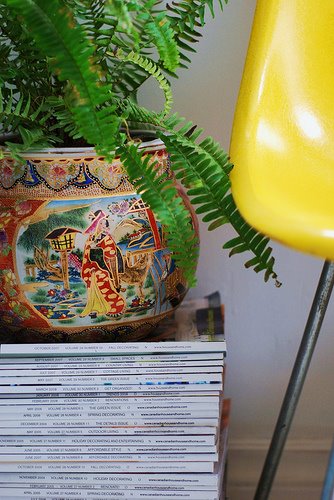
I love piles of fabric. I love piles of anything really. Fabric, books, magazines... (the 2 beaded boxes on top of the books hold the ashes of 2 of my cats that have passed away in the last few years)


The desk is an Ikea table top wrapped in vintage retro fabric, and topped with a piece of glass (some photos were taken before the glass was bought). The inspiration board over my desk is made from some trim I found at Home Depot that I spray painted and made into a frame and I nailed a large piece of cork to the wall behind it.


The chair is a vintage Herman Miller Eames that came upholstered in green fabric, that I found at a local antique market for $160. The souvenir pillow cover I found on eBay. It is now in the trash, as Felix, gawd love him, peed all over it. The lamp I found at a local mid-century shop for $40.


Below are some tchotchkes I have on my desk. The grapes I found on eBay, the dog letter holder in Etsy, and the clock I bought several years ago at an antique fair. I write with markers as often as I can.


Next is an armoire I spent alot of time reworking. I found it at a flea market in a town about an hour from here for $159. It was a darkish brown wood (see here), so I dry-brushed it with the teal paint I used in my dressing room. I removed the door and built shelves for the section that you would ordinarily hang clothes in. I bought some vintage wrapping paper on Etsy and mod-podged it to the shelves. It stores my copier/scanner on the bottom shelf, and behind that is my modem/router and all that fun stuff hidden away. Everything you see is either from eBay, Etsy, local vintage shops and an Asian shop in the Byward Market.


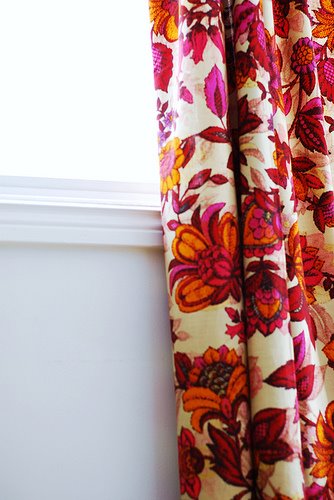
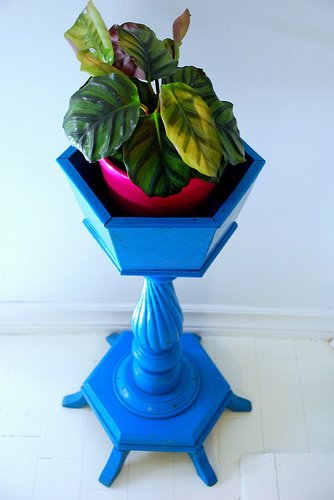
I walk through Chinatown and Little Italy on my way home from work. I stopped in a shop in Chinatown one day, found the pot below and another one, and carried them home (HEAVY!). The yellow Eames shell chair I bought on eBay from the same shop where I bought the green lamp. The curtain fabric I found on Etsy, and since I don't sew I used that iron-on tape to make a hem and used curtain clips to attach them to the rod. Easy peasy.


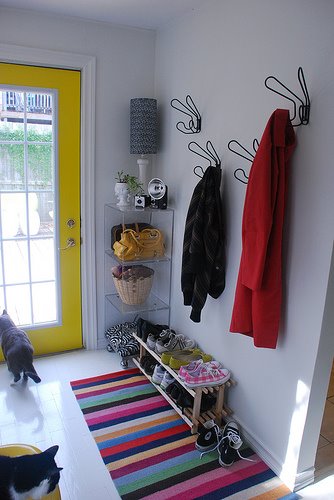
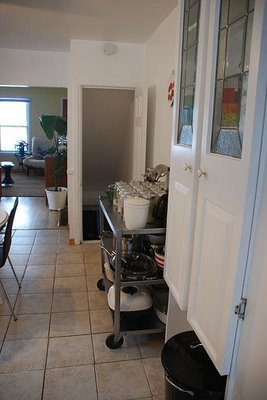
Jo had suggested I paint the frame of the back door yellow, and it is one of my favourite touches in the room. When the kitchen was renovated I tore out the only closet on the main floor, so this back corner is where I stash my outerwear. Below is also a photo I took standing against the window, looking into the (new) kitchen. (I haven't gotten around to painting that little ramp into the office yet).


So that's my office in it's current state. It's an addition to the house and since it's not very well insulated, ideally I'd love to tear it down and rebuild it bigger and properly insulated. I may settle for making the powder room smaller, and building a closet where the coat hooks are (it's currently not wide enough there to have a closet where coats could hang). The powder room is hideous, hence the lack of photos. So there's still work to do. The list somehow seems to keep growing no matter what I get done...

Tuesday
Jan272009

Before and after

Just a heads-up for those folks who were following my kitchen renovation. I've done a post over on my kitchen blog of before and after photos, which I think are really helpful to give a realistic idea of the extent of the project. A peek is below, and here is a link to the post.

Friday
Jan162009

A party in my drawers

This blog chronicles my entire kitchen renovation from start to finish. Greentea Design has provided me with their solid wood kitchen cabinets, and I'm taking care of the rest.

If you'd like to be brought up to date, check out my kitchen remodel blog for an archive of previous posts. I posted recently about the hatch door created for access to the basement, and now, how I've organized and made use of all the wonderful cabinetry.

Yes folks, there is a party happening in my drawers. My kitchen cabinet drawers that is. All TWENTY FIVE of them (27 but 2 under the sink are just drawer faces). I cannot begin to explain how exciting it was to organize this kitchen, especially those drawers. I have never had a kitchen that had adequate drawer space. This kitchen has so many that despite all the drawer-type kitchen stuff I have, I still have 2 that are essentially unused (I had to find things to put in them because the thought of empty drawers unnerved me). It's allowed me to be more organized than I have ever been in any of my former kitchens, and I enjoy cooking so much more than I ever have. I've even been taking photos of the meals I've prepared. This weekend I am having my family over for dinner for the first time since the reno has been completed. I am so stoked to show it off. And I know they're all dying to see it in person finally.

I thought for one of my last kitchen posts I would show you how much space these incredible Greentea cabinets have and the party that is going on in my drawers. Because let me tell you, having a drawer dedicated to spices is a party in itself!! Sorry if this is a little long-winded, but I felt compelled to document all of it (in the hopes of calming my level of excitement perhaps?)

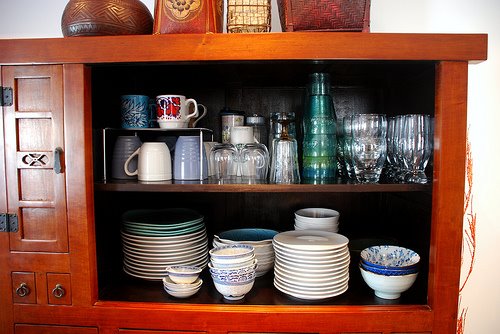
Let's start with the pantry. I adore this unit so much. When I sell the house, I have to take the pantry with me. It's a stunning piece of furniture, I've got to say. And I must mention that since all the cabinets have sliding doors (except the uppers), they are SO easy to remove which allows you a clear view of everything inside. Great for cleaning/organizing binges.


Here is the top section of the pantry, which houses essentially ALL of my dishes (alot of which need replacing) and glassware.


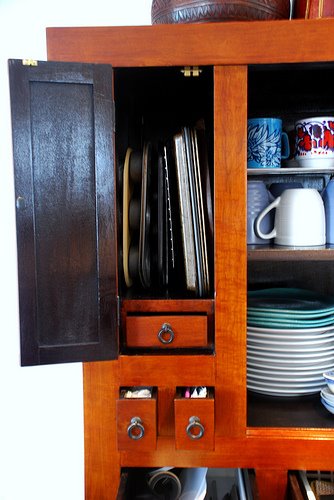
This is a door to the left of the top section of the pantry. It is PERFECT for housing baking sheets and anything else flat, especially useful for me because my range (where I would typically put those items) does not have a drawer for storage. It also has a little secret drawer inside, which I figured I'd stash money in for pizza nights (Jo is laughing right now because she knows how much pizza I consume).


Below is the first row of drawers in the pantry. It houses knives, small kitchen gadgets, a drawer dedicated to the cats' food bowls and cans of wet food, chopsticks, and my growing collection of wooden spoons.

For more photos, and to leave comments, click HERE.

Monday
Jan122009

The basement hatch

This blog chronicles my entire kitchen renovation from start to finish. Greentea Design has provided me with their solid wood kitchen cabinets, and I'm taking care of the rest.

If you'd like to be brought up to date, check out my kitchen remodel blog for an archive of previous posts. I posted recently about the backsplash, dining table and yet more decorating. Now I thought I'd dedicate a post to the hatch door created for access to the basement - a GENIUS idea.

I cannot express the magnitude of how genius of an idea it was to take out part of the wall that sectioned off the basement stairs, and have a hatch door created. I have talked about this in previous posts, but OMG it turned out so swimmingly that I had to dedicate a post to it. This is such a great idea for folks out there who have really limited space, as I do. This house is 12' 2" wide - so that is the width of the kitchen, and the section where the wall to the basement was made that about 9.5' wide. Let me show you some before photos. Now, this decision was made partway through the demolition phase so I did not specifically take before photos of the area. Below are some I happened to have already (and one I snuck during demo when I was deciding what to do).


Leaving that wall meant the pantry unit would have had to have been placed closer to the door to my office and with the fridge there, that would have made the doorway very tight. Then with the dining table down the middle of the space, you would have had to shimmy sideways to get by the table, or I would have had to use a small 4 person table instead. Here are a couple photos I took during the reno.


Below, my completed hatch. Genius I tell you - GENIUS!! Worth every penny. And I love that my house, that was previously lacking any architectural feature WHATSOEVER, now has something slightly quirky, and isn't just a straight boring wall.

For more photos, a video I made to show the hatch in action, and my new artwork, click HERE.